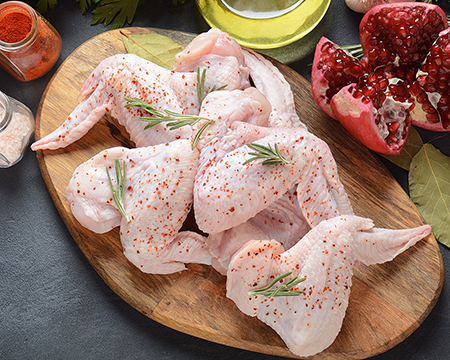
Here’s the secret: an easy oven-baked method and amazing sauce will make chicken wings the star of any party. They say chicken wings are the ultimate party food… and they are!
Roast chicken wings in the oven in a 475º F oven on a rack in a baking sheet until crisp, for 40 to 45 minutes. Once you have them baking, it’s time to choose the sauce and whisk ingredients together. Here are some options:
Classic – 3 tbsp of cayenne pepper sauce, 2 tbsp melted unsalted butter, 1/4 tsp freshly ground pepper and 1 tbsp cider vinegar. There’s a reason why this sauce is called classic. It is one of our favourite sauces.
Satay – 2 tbsp peanut butter, 1 tbsp each brown sugar, fish sauce & lime juice, 1 tsp scallion, thinly sliced.
Chipotle – A great sauce for baked wings.3 chipotles in sauce, minced, 1 tbsp maple syrup, 1 tbsp melted butter.
Miso – 1/4 cup honey, 2 tbsp balsamic vinegar, 2 tbsp white miso.
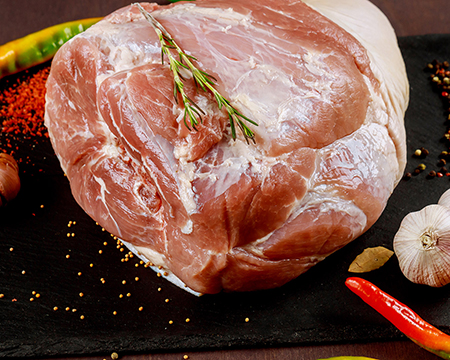
Most of us love pulled pork recipes, carnitas, or roasted pork shoulder. It’s one of the best go-to food options when you need to feed a crowd or make a meal with leftovers to spare. So, how can we master this cut of meat?
Pork shoulder is a relatively tough and inexpensive cut of meat layered with fat that comes from the pig’s shoulder region. You may also see this cut labeled as pork butt, but this is actually shoulder meat. Don’t fall for the belief that this cut of meat is rough. Cook it low and slow for a few hours and it will be transformed into tender, juicy shreds that fall apart with the touch of your fork.
So, first thing to know: pork shoulder and pork butt. While pork shoulder and pork butt come from the same basic region of the pig and can be used interchangeably, they are cut from opposite ends of the shoulder region. Pork shoulder is cut from the thinner end of the shoulder, contains slightly less fat, and can be better for cooking and slicing whole. Pork butt, on the other hand, is cut from the thicker, fattier end of the shoulder, and excels in recipes like pulled pork where the meat is meant to be shredded. This is the cut that’s typically used for ground pork. You can also get freshly ground at our butcher shop. Just ask our staff to assist you with this.
It’s best to cook pork shoulder soon after buying it, although it will keep for two to three days in the fridge. Any longer than three days and it’s best to store it in the freezer, where it will keep for up to six months. Plan to give frozen pork shoulder roughly 24 hours (for every five pounds of meat) to thaw in the refrigerator. Pork shoulder is super versatile, forgiving, and quite easy to cook. Unlike the more lean tenderloin and chops, pork shoulder is an incredibly forgiving cut of meat. It becomes more tender as it cooks and benefits from a lengthy cook time, so even if it stays on the heat a few minutes too long, you won’t suddenly end up with something dry or rubbery. Part of the versatility that comes with pork shoulder is the form in which you choose to cook it. This cut can be cooked whole, as with a slow-cooked pork roast; cut into large chunks, for making pulled meat; prepped and cooked as smaller chunks, for stews and chili; or even ground for meatballs and patties.
Last, but not least, braise it in the oven, stew it, braise it in the slow cooker, cook it in the pressure cooker.
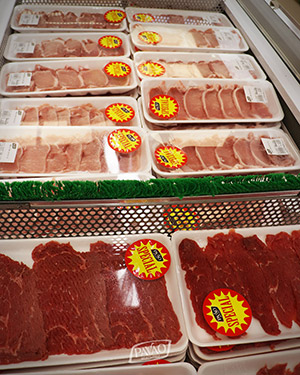
In the culinary arts, the term cutlet is used to refer to a boneless, thin cut of meat—chicken, veal, pork, or lamb—that cooks very quickly and is usually pan-fried. Most cutlets are made by pounding the meat until there’s even thinness and are often dusted with flour or coated in breadcrumbs before cooking.
Types of cutlets
When producing cutlets, the meat is usually taken from the leg or rib section of veal, pork, or lamb, while chicken and turkey are from the breast. Veal cutlets may also be labeled as “scallops” or “scallopini.” While the meat itself is tender, it must still be carefully fabricated to remove any tissue that could be chewy after it’s cooked. On the other hand, cutlets made from chicken and turkey come from the breast, which is already tender.
Cooking
Regardless of the type of meat you have, when it comes to cutlets, they cook in a short amount of time due to their thinness. Most recipes will call for dredging in flour or coating in breadcrumbs before pan-frying, but you can also simply season the raw cutlets and cook in the oil or butter. Cutlets may also be simmered in a sauce, broiled, or roasted, although these methods are not as common.
Recipes
There are many classic recipes made from cutlets. The most popular ones are the veal or chicken piccata, and the veal saltimbocca.
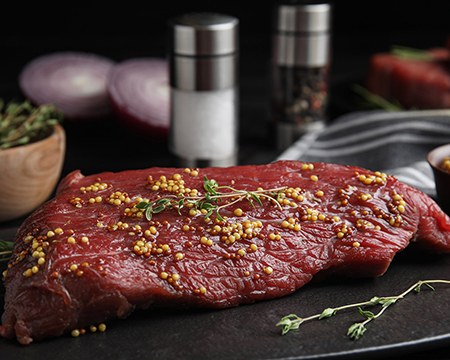
When it comes to beef, there are so many versatile recipes, one can almost make a different one everyday of the year and not run out of ideas. That’s right! Yes, we should all go out for dinner once in a while – as a reward for working so hard, as a way to spend quality time with family and friends without having to worry about cooking. However, that should not happen on a daily basis. The truth is, cooking is also very relaxing and bring a sense of accomplishment to the “chef” when everyone loves the food at the table.
As we mentioned already, beef can help you make these delicious recipes at home. Beef stew, burgers, roast, meatballs, sandwiches… you see! There are some awesome recipes out there for us to master.
Let’s consider a stew. Beef, potatoes and other vegetables are simply magical when roasted in a skillet and then transferred to the slow-cook for a delicious Winter meal. Or perhaps a “boeuf Bourguignon”. Thin sliced beef cooks quickly, making it possible to have this “fancy” recipe (inspired in French cuisine) on a crazy weeknight.Consider as well a beef stroganoff – a creamy beef-topped pasta is one of our go-to comfort foods.And it only takes about 30 minutes to make.
You see! Beef is a true inspiration. When you pass by our butcher shop, tell our staff what you are planning to make and we will be more than happy to help you get the best cut of beef for your recipe.
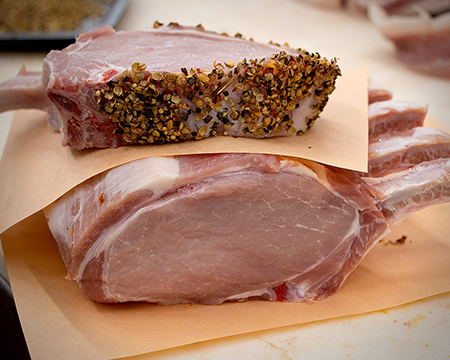
Pork rack can be tricky to cook, as it can dry out quickly, but cooking it sous vide with precise time and temperatures will ensure perfect results. From the French for ‘under vacuum’, sous vide is a method of cooking where ingredients are sealed in an airtight bag and submerged in a water bath. This method not only ensures a constant cooking temperature, but allows the food to cook for long periods of time without losing any of its flavour or moisture.
Steps to cooking the rack sous vide
– Preheat the water bath to 62°C.
– Season the pork rack with salt and place it in a vacuum bag with a little olive oil then vacuum seal.
– Place the bag in the preheated water bath to cook for 90 minutes.
– Remove from the bag and drain on kitchen paper.
– To finish, remove the skin and crisp it up in a hot frying pan while searing the rack on all sides at the same time. After resting, carve the pork and serve with the crispy skin.
You can also try adding herbs to the bag for extra flavour; thyme, sage and rosemary all work well and whole garlic cloves are also good. You could try flavouring the pork with a dry spice rub (as hot or mild as you like) before cooking for a barbecue-style twist.
Seasoning is without a doubt one of the most important aspects of cooking. When it comes to meat, it is the secret behind a very delicious, tasty meal. The most important ingredients are salt and pepper (and sometimes the only ones you really need). In most cases, however, it can’t just expect to combine them and automatically get a banquet from heaven. Salt and pepper’s function is to enhance flavour, never to change it.
How should we season our meat?
Mosts chefs will tell you that you want your seasoning hand to be about 1 foot from the food product your are trying to season. This way you can cover all of the surface area of the food item, and of course don’t forget to season both sides of your food item. Season generously! In other words, don’t cover your meat with a rub, but cover it with a good portion of seasoning.
Next, don’t forget the most important rule: season only once! Taste as many times as necessary, but season only once. You can always add more if it needs it, but if you put too much seasoning, you will ruin your food. But remember, never taste raw meat!
Check out the seasoning options we have available at our shop. You can also ask our staff for ideas and suggestions.